 how-to
Retail Store Layout Optimization for Increased Sales
Table of Contents
- How Store Layout Influences Customer Behavior and Sales
- Step 1: Analyze Current Traffic Patterns with Retail Store Traffic Analysis
- Step 2: Design Your Floor Plan and Customer Journey
- Step 3: Implement Retail Customer Flow Strategies
- Step 4: Use a Retail Planogram for Strategic Product Placement
- Step 5: Explore Retail Store Layout Ideas for Your Format
- Step 6: Optimize Checkout and High-Margin Product Placement
- Step 7: Measure and Test Your Retail Store Layout Optimization
- Frequently Asked Questions
Last Updated: October 10, 2026
How Store Layout Influences Customer Behavior and Sales
Your retail store layout controls how customers move through your space, what they buy, and how much they spend. The right retail store layout optimization strategy increases sales by making shopping easier and more enjoyable.
Better traffic flow leads to longer shopping times, higher basket sizes, and improved profit margins.
Store layout controls customer movement, determines which products catch attention, and influences impulse purchases at key decision points.
Step 1: Analyze Current Traffic Patterns with Retail Store Traffic Analysis
Establish a baseline of current performance and traffic behavior before redesigning. Most retailers fail by redesigning based on intuition rather than data.
Set Your Baseline Metrics
Define and record these metrics for your current layout over a full two-week period:
- Sales per square foot: Total sales ÷ total retail floor space (excluding stockrooms and back-of-house). This is your primary efficiency measure.
- Average transaction value: Total sales ÷ number of transactions.
- Conversion rate: Number of transactions ÷ total customer count.
Record these across different times of day, weekdays, and weekends, as patterns vary significantly by daypart and day-of-week.
Map Traffic Flow and Identify Friction Points
Use a floor plan printout or digital layout tool. Stand at key observation points (entrance, aisle intersections, checkout) and mark customer movement with arrows or tally marks across at least 20 hours of observation.
Look for natural entry-to-exit paths, dead zones with minimal traffic, congestion points, dwell hotspots where customers pause longest, and bounce points where customers exit prematurely.
Document Customer Behavior Patterns
Note behavioral signals: which sections draw repeat visits, whether customers navigate confidently, checkout wait times and cart abandonment, which displays get examined, and whether customers ask staff for product locations (a sign of poor wayfinding).
Analyze point-of-sale data for patterns: which products sell together, which categories have high shrink or slow velocity, and which dayparts drive the most revenue.
Establish Your Testing Protocol
Commit to a measurement schedule: Week 1-2 baseline collection, Week 3-4 implement one isolated change, Week 5-6 measure and compare. Keep changes that improve sales per square foot, conversion rate, or dwell time by at least 5%; revert if they underperform. Test one variable at a time.
Step 2: Design Your Floor Plan and Customer Journey
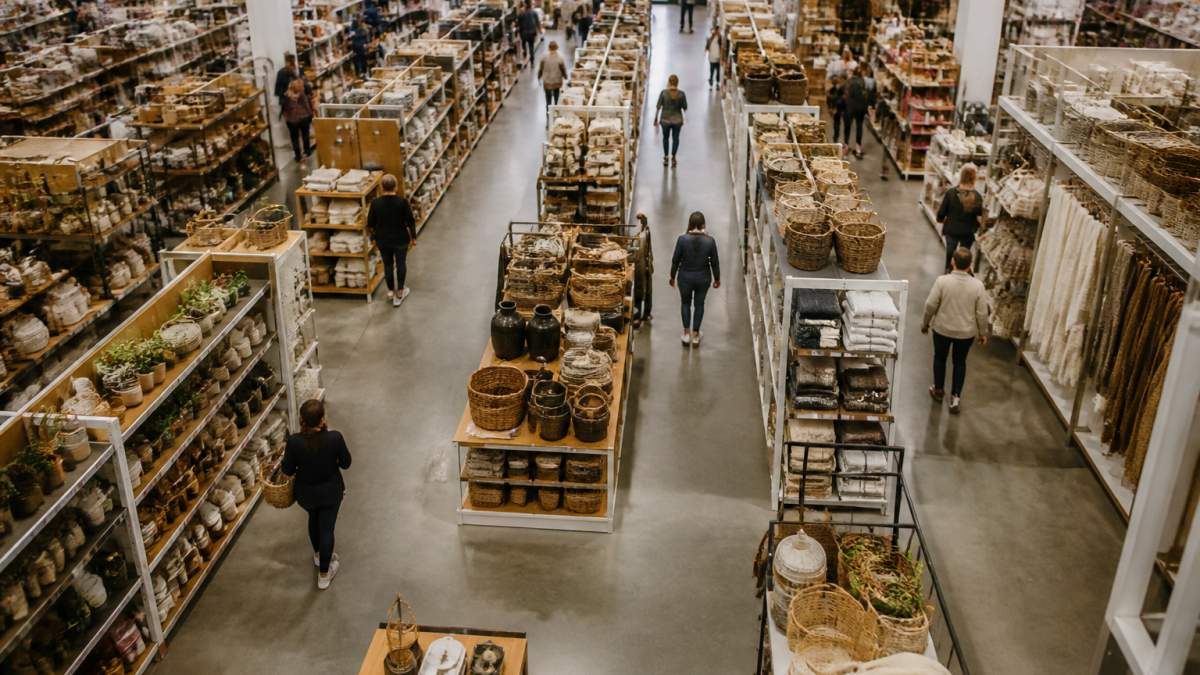
Your floor plan should guide customers on a logical path. Most customers move counterclockwise; use this natural tendency. Map your customer journey: entry point, first impression, path through high-margin products, and exit.
Create a Decompression Zone at Entry
Customers need 5-10 feet to adjust when entering. Don't place products or signage in this decompression zone. This reduces decision fatigue, makes customers feel less rushed, and increases browsing and purchases.
Plan Aisle Width and Clear Sightlines
Ideal aisle width is 5-6 feet. Clear sightlines from entrance to back make customers feel in control and shop longer. Use lower fixtures near the front and taller displays in the middle and back.
Step 3: Implement Retail Customer Flow Strategies
Retail customer flow removes friction. Make circulation paths obvious with floor markings, lighting, or color changes. Remove dead ends and connect aisles in loops. Place complementary products near each other to increase basket size. Put slow-moving items in high-traffic zones; fast sellers will be found anyway.
Step 4: Use a Retail Planogram for Strategic Product Placement
A retail planogram is your blueprint for product placement. Reserve eye-level space for high-margin items and best sellers, they sell 20-30% more than top or bottom shelf products. Create a planogram reflecting sales data: high-velocity products get prime space, slow movers get secondary positions.
Use the planogram to ensure consistent placement, train staff, track inventory efficiently, and test changes systematically. Update quarterly as sales patterns change.
Step 5: Explore Retail Store Layout Ideas for Your Format
Different store types need different layouts. What works for a grocery store fails in a boutique.
Grid Layout for Grocery and Convenience Stores
The grid layout uses parallel aisles with straight-line shelving for high-volume, low-decision shopping. Advantages: efficient space use, easy navigation, fast shopping. Disadvantages: monotonous feel, limited display space, fewer impulse zones. Best for customers who know what they want.
Loop Layout for Fashion and Department Stores
The loop layout creates a circular path encouraging browsing. Advantages: customers see all merchandise, longer shopping times, natural impulse opportunities. Disadvantages: requires more space, slower checkout, can feel overwhelming. Best for discovery-focused shopping.
Free-Form Layout for Specialty and Boutique Stores
The free-form layout arranges fixtures and displays without a strict pattern. It creates a curated, browsing experience.
Advantages: Unique atmosphere, encourages exploration, flexible for seasonal changes, memorable shopping experience.
Disadvantages: Can feel confusing, requires clear signage, harder to train staff, less efficient use of space.
Free-form layouts work best for high-touch, discovery-focused shopping experiences.
Schedule a Free Initial Consultation by Video Call! →
Step 6: Optimize Checkout and High-Margin Product Placement
Your checkout area is your final sales opportunity. Use it strategically.
Place high-margin impulse items at checkout. Magazines, snacks, accessories, items customers buy without planning.
Make checkout efficient. Long lines drive customers away. Ensure adequate registers and clear queuing paths.
Position complementary products near checkout. If someone buys a shirt, place belts or accessories nearby.
Step 7: Measure and Test Your Retail Store Layout Optimization
Layout optimization is iterative. You'll never get it perfect on the first try. The retailers who win are those who test systematically, measure rigorously, and adapt based on data.
Run Controlled Layout Tests
Each test should isolate one variable. Examples of testable changes:
- Relocate a product category to a higher-traffic zone.
- Adjust aisle width or direction.
- Redesign the checkout area (add registers, change queuing, reposition impulse items).
For each test:
-
Define the hypothesis: "Moving the coffee section from aisle 4 to the front-left corner will increase coffee sales by 10% and boost adjacent product sales (filters, sweeteners) by 15%." Be specific.
-
Set the test duration: Run for at least two full weeks (14 days) to account for day-of-week variation. Avoid testing during major holidays, promotions, or unusual events that skew results.
-
Control other variables: Don't change pricing, run a promotion, or adjust staffing during the test. Don't test multiple changes at once. If you must adjust inventory, document it.
-
Measure before and after: Compare the same KPIs you established in Step 1:
- Sales per square foot (for the relocated category and adjacent zones)
- Average transaction value
- Conversion rate
- Dwell time in that zone
- Customer traffic in that zone
-
Document the result: Record whether the change met your hypothesis, exceeded it, or failed. Note any unexpected outcomes (e.g., the relocated category sold more, but adjacent categories sold less).
Interpret Results and Make Decisions
A successful test shows measurable improvement in at least one primary metric without degrading others. Use this decision framework:
- Keep the change if sales per square foot in that zone increased by 5% or more, or if average transaction value increased by 3% or more.
- Modify and retest if the change showed promise but didn't hit targets (e.g., the category sold better but foot traffic didn't increase as expected, try a different location or add signage).
- Revert if the change decreased sales, increased customer confusion, or created operational problems.
Don't rely on gut feeling. If the data doesn't support the change, revert it, even if you liked the idea.
Account for Operational Constraints
Layout changes affect more than customer experience, they impact staff workflow, inventory management, and safety. Before finalizing a test result, confirm:
- Replenishment efficiency: Can staff restock the relocated category without excessive travel? Does the new location increase or decrease labor time?
- Receiving and back-of-house access: Is the new location near a receiving area or does it require longer carry distances?
- Safety and compliance: Are aisles still wide enough for emergency egress (typically 36 inches minimum for secondary exits, per OSHA guidelines)? Are reach heights accessible to staff and customers of varying abilities?
If a layout change improves sales but requires staff to spend 30% more time restocking, the net benefit may be negative. Involve your operations and merchandising teams in the test so they can flag constraints early.
Build a Test Log and Iterate
Create a simple log documenting every test:
| Test # | Change | Hypothesis | Duration | Result | Sales Impact | Decision | Notes |
|---|---|---|---|---|---|---|---|
| 1 | Moved coffee to front-left | +10% coffee sales | 2 weeks | +12% coffee, +8% filters | +$340/week | Keep | Staff noted easier restocking |
| 2 | Widened aisle 3 to 6 feet | Reduce congestion, +5% dwell | 2 weeks | +3% dwell, -2% sales/sq ft | -$120/week | Revert | Lost shelf space; congestion wasn't the issue |
| 3 | Added checkout register | Reduce wait time, +3% conversion | 2 weeks | +4% conversion, +2% avg ticket | +$280/week | Keep | Requires one additional staff member |
Over time, this log becomes your playbook. You'll see patterns in what works for your store format, customer base, and product mix.
Review and Adjust Seasonally
Layout optimization is not a one-time project. Review your layout quarterly and adjust for:
- Seasonal demand shifts: Summer might favor beverages and outdoor products; winter might favor comfort items or gift sets.
- New product introductions: Where do new categories go? Test their placement before committing.
- Slow-moving inventory: If a product category isn't selling, test a more visible location or adjacent placement with complementary items.
- Competitive changes: Visit competitor stores quarterly. Note layout changes they've made and consider testing similar ideas in your store. Refining these physical arrangements often reveals deeper opportunities for business model optimization that extend well beyond the sales floor.
Frequently Asked Questions
How does store layout affect retail sales?
Store layout directly influences customer behavior, dwell time, and purchasing decisions. A well-designed retail store layout optimization encourages customers to spend more time browsing, discover more products, and make additional purchases. Strategic placement of high-margin items, clear navigation, and logical product flow increase average transaction value and overall revenue. Poor layout creates confusion, reduces customer satisfaction, and leaves money on the table.
What's the best way to use a retail planogram in my store?
A retail planogram maps exactly where each product should be placed on shelves and displays. Use it to place high-margin products at eye level, group complementary items together, and ensure consistent product visibility. Update your planogram quarterly based on sales data and seasonal trends. Train staff to maintain the planogram and rotate stock according to the plan. This approach increases sell-through rates and reduces out-of-stock situations.
How can I improve retail customer flow in my store?
Improve retail customer flow by creating a logical path through your store that exposes customers to the most products. Use a loop or grid layout depending on your format. Eliminate dead ends, widen main aisles, and place destination items (high-demand products) at the back to draw customers through the entire space. Add clear signage and ensure sightlines so customers can navigate without confusion. Test your layout with actual customers and adjust based on traffic patterns.
How often should I change my retail store layout?
Review your retail store layout optimization every 6-12 months or when sales decline, customer feedback suggests navigation issues, or seasonal inventory changes. Major redesigns should happen annually or when entering a new market. Minor adjustments like product repositioning and promotional displays can happen monthly. Track metrics like sales per square foot and customer dwell time to determine when changes are needed. Avoid frequent major changes that confuse loyal customers.